How to Convert Horizontal Video to Vertical Without Losing the Subject
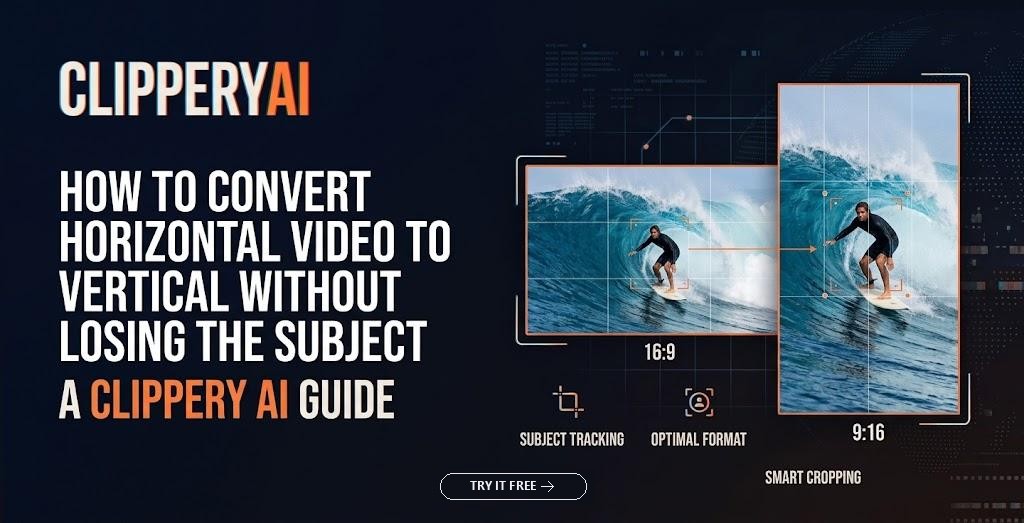
To convert horizontal video to vertical, you change a 16:9 landscape frame into a 9:16 portrait frame using one of three methods: crop a fixed vertical window out of the picture, place the whole landscape frame inside a vertical canvas with bars or a blurred background, or reframe dynamically so the crop follows whoever is talking. Cropping and reframing give you full-screen video for TikTok, Instagram Reels and YouTube Shorts. Padding keeps everything visible but leaves much of the phone screen empty.
Which method works best depends less on your software and more on what is in the shot. One person talking to a camera converts easily. A four-person panel filmed from the back of a conference room, or a screen share full of small text, needs a different plan. This guide covers each approach, the simple math behind the crop, and the mistakes that make converted footage look like an afterthought.
What happens when you convert horizontal video to vertical?
Standard HD landscape video is 1920 pixels wide by 1080 pixels tall, a 16:9 aspect ratio. Vertical video for short-form platforms flips those numbers to 1080 by 1920, or 9:16. Going from 16:9 to 9:16 is the whole job, but there's a catch.
You can't get there by rotating the file. Rotation turns the picture on its side, so people end up lying across the screen. Instead, you cut a tall window out of the wide frame. If you keep the full height of a 1080p frame, a 9:16 window is only about 608 pixels wide. You keep roughly a third of the original picture and discard the rest. That window then gets scaled up to fill a 1080 x 1920 export, which softens the image a little.
Footage recorded in 4K (3840 x 2160) gives you far more room. A full-height vertical crop from 4K is about 1,215 pixels wide, already wider than a 1080 x 1920 export needs, so the result stays sharp and you have spare space to move the window around. If you know you'll regularly turn recordings into vertical clips, recording in 4K is one of the cheapest upgrades available.
Three ways to turn landscape video into portrait video
| Method | What it looks like | Best for | Main drawback |
|---|---|---|---|
| Static crop | One fixed vertical window for the whole clip | A single seated speaker who stays centered | The subject drifts out of frame; a second person disappears |
| Padding (bars or blurred background) | The full landscape frame sits in the middle of a vertical canvas | Wide shots, product demos, slides where everything matters | The subject looks small on a phone |
| Dynamic reframe | The crop window moves to follow the speaker or action | Interviews, podcasts, webinars, streams | Slow to do by hand; automated tracking needs a review |
Static crop
A static crop picks one vertical window and leaves it in place. It's the fastest option and works well for a solo creator recording at a desk. Problems start when the subject leans, gestures or walks. A static crop can't follow them, so they slide toward the edge or out of frame. In a two-person interview, one guest simply vanishes. If you only need to crop video for TikTok from a single locked-off shot, though, a static crop is often all it takes.
Padding with bars or a blurred background
Padding shrinks the full landscape frame to the width of the vertical canvas and fills the space above and below with black bars, a solid color, or a blurred, enlarged copy of the same footage. Nothing gets cut, which makes it useful for wide product shots, sports plays or slides where every part of the frame matters.
The trade-off is size. A landscape frame scaled to 1080 pixels wide fills only about a third of a vertical screen's height, so faces become small on a phone. Padding is a reasonable fallback when you need to resize video for Instagram Reels without losing anything, but it rarely feels native in a vertical feed.
Dynamic reframing
Dynamic reframing moves the crop window during the clip. When the host speaks, the frame sits on the host; when the guest answers, it shifts to the guest. By hand, that means adding position keyframes at every change. Many editing apps now include an auto reframe option that tracks faces or motion, and dedicated clipping tools reframe video for vertical as part of producing each clip.
For talking-head footage, dynamic reframing usually gives the most natural result. Automated versions still deserve a quick review, because tracking can jump to the wrong person during crosstalk or latch onto movement in the background.
How to convert horizontal video to vertical by hand
If you prefer a regular video editor, the process is similar in almost any desktop or mobile app:
- Start from the best source file you have. Use the original camera or recording file rather than a compressed download, because cropping magnifies compression artifacts.
- Create a vertical project. Set the canvas to 1080 x 1920, the standard vertical video resolution, and match the frame rate of your footage, usually 24, 30 or 60 frames per second. Mismatched frame rates can cause stutter.
- Scale the footage to fill the height. The video should cover the canvas from top to bottom, with the sides extending past the frame.
- Position the frame on the subject. Slide the footage left or right until the speaker's face sits near the center. Add a new keyframe whenever the speaker changes or moves significantly.
- Check the edges. Watch for half-visible faces, hands cut off mid-gesture, and on-screen text or logos sliced in two.
- Keep captions and graphics in the safe area. Short-form apps place buttons, usernames and descriptions along the bottom and right side of the screen, so keep important text away from those zones.
- Export one file per clip. An MP4 with H.264 video is accepted almost everywhere.
For a single 30-second clip, this takes a few minutes. For a 45-minute interview where the conversation bounces between two people, every speaker change becomes a manual keyframe and the hours add up. That's where automation starts to earn its place.
When vertical isn't the right format
Not every shot belongs in 9:16. A webinar built around dense slides, a whiteboard lesson or a wide establishing shot loses its meaning when two-thirds of the frame disappears.
Two alternatives are worth knowing. A square 1:1 crop from 1080p footage keeps 1080 x 1080 pixels, a little more than half the original width, and still plays well in most social feeds. A standard 16:9 export suits LinkedIn, websites and email, where viewers expect wider video.
Picture a cooking instructor who films an overhead shot of a cutting board with her face in a small box in the corner. A vertical crop would force a choice between her hands and her face. A square version keeps both, which is usually the better call.
Converting horizontal video to vertical automatically with ClipperyAI
If your horizontal footage is a long recording, such as a podcast episode, a conference talk, a livestream or a sit-down interview, and your real goal is short clips, the conversion is only one step in a bigger job. ClipperyAI handles it as part of making each clip. You upload the full recording or paste a link to a video you own. It reads the whole thing, picks out complete moments, reframes each one to vertical around whoever is speaking, adds word-timed captions inside the frame, and returns finished clips to download. You can also choose square 1:1 or wide 16:9 for an export when vertical isn't the best fit.
It helps to know what it isn't. ClipperyAI is built to turn long recordings into short clips; it isn't designed to convert a full 20-minute video into one vertical file, frame for frame, and a regular editor is the right tool for that. It also only edits your existing footage and doesn't generate video, images or voices. You can see how ClipperyAI picks and frames clips on the homepage, and the plans and pricing section lists video length limits, from 30 minutes on the free plan to 180 minutes on Pro.
For conversation-heavy footage, the page on turning podcast episodes into vertical clips explains how framing follows two speakers. If you record long gaming or creative sessions, the stream highlights workflow shows how that footage is handled.
How to shoot horizontal footage that converts well later
The easiest conversions start before you press record. If you know a recording will become vertical clips, a few habits make the crop far more forgiving:
- Keep the main subject near the center of the frame rather than on a rule-of-thirds line.
- Leave some space around the person so a vertical window has room to breathe.
- In two-person setups, seat guests closer together or give each person their own camera angle.
- Avoid burning lower-third name graphics into the master recording; a vertical crop often cuts them in half.
- Record in 4K when your camera and storage allow it.
- Prioritize clear audio, since captions and clip selection both depend on understandable speech.
If you're working from an existing YouTube library, our guide on turning a long YouTube video into Shorts compares YouTube's built-in option with manual and automatic methods.
Choosing the right conversion method
Converting landscape to portrait video is mostly a framing decision. Crop when one person stays put, pad when everything in the shot matters, and reframe when a conversation moves between speakers. Check the edges, keep text inside the safe area, and don't force slide-heavy footage into a shape that hides the point. If you have a stack of long recordings waiting to become clips, try ClipperyAI on one of them and compare the result with your current workflow. And if you're weighing several clipping tools, these ten questions to ask before choosing an AI clip maker will help you test them fairly.
Frequently asked questions
Can I just rotate a horizontal video to make it vertical?
No. Rotating a landscape video 90 degrees turns the picture sideways, so people and objects appear on their side. To get an upright vertical video, you crop, pad or reframe the original frame instead.
What resolution should a vertical video be?
1080 x 1920 pixels (9:16) is the common standard for TikTok, Instagram Reels and YouTube Shorts. Higher resolutions also work, but 1080 x 1920 is a safe default for short-form uploads.
Does converting to vertical reduce video quality?
It can. A vertical crop from 1080p footage keeps only about 608 pixels of width, which must be enlarged to fill the frame, so the result looks slightly softer. Cropping from 4K footage avoids most of that loss.
How do I convert horizontal video to vertical for free?
Most free desktop and phone editors let you create a 1080 x 1920 project and position the footage by hand. If you need short clips rather than a full-length vertical video, ClipperyAI's free plan includes 60 minutes of processing a month for recordings up to 30 minutes long.
Is it OK to post horizontal video on TikTok or Reels?
You can, but a landscape video plays with large empty areas above and below it on a phone, so the subject appears small. Converting to vertical or square usually makes better use of the screen.